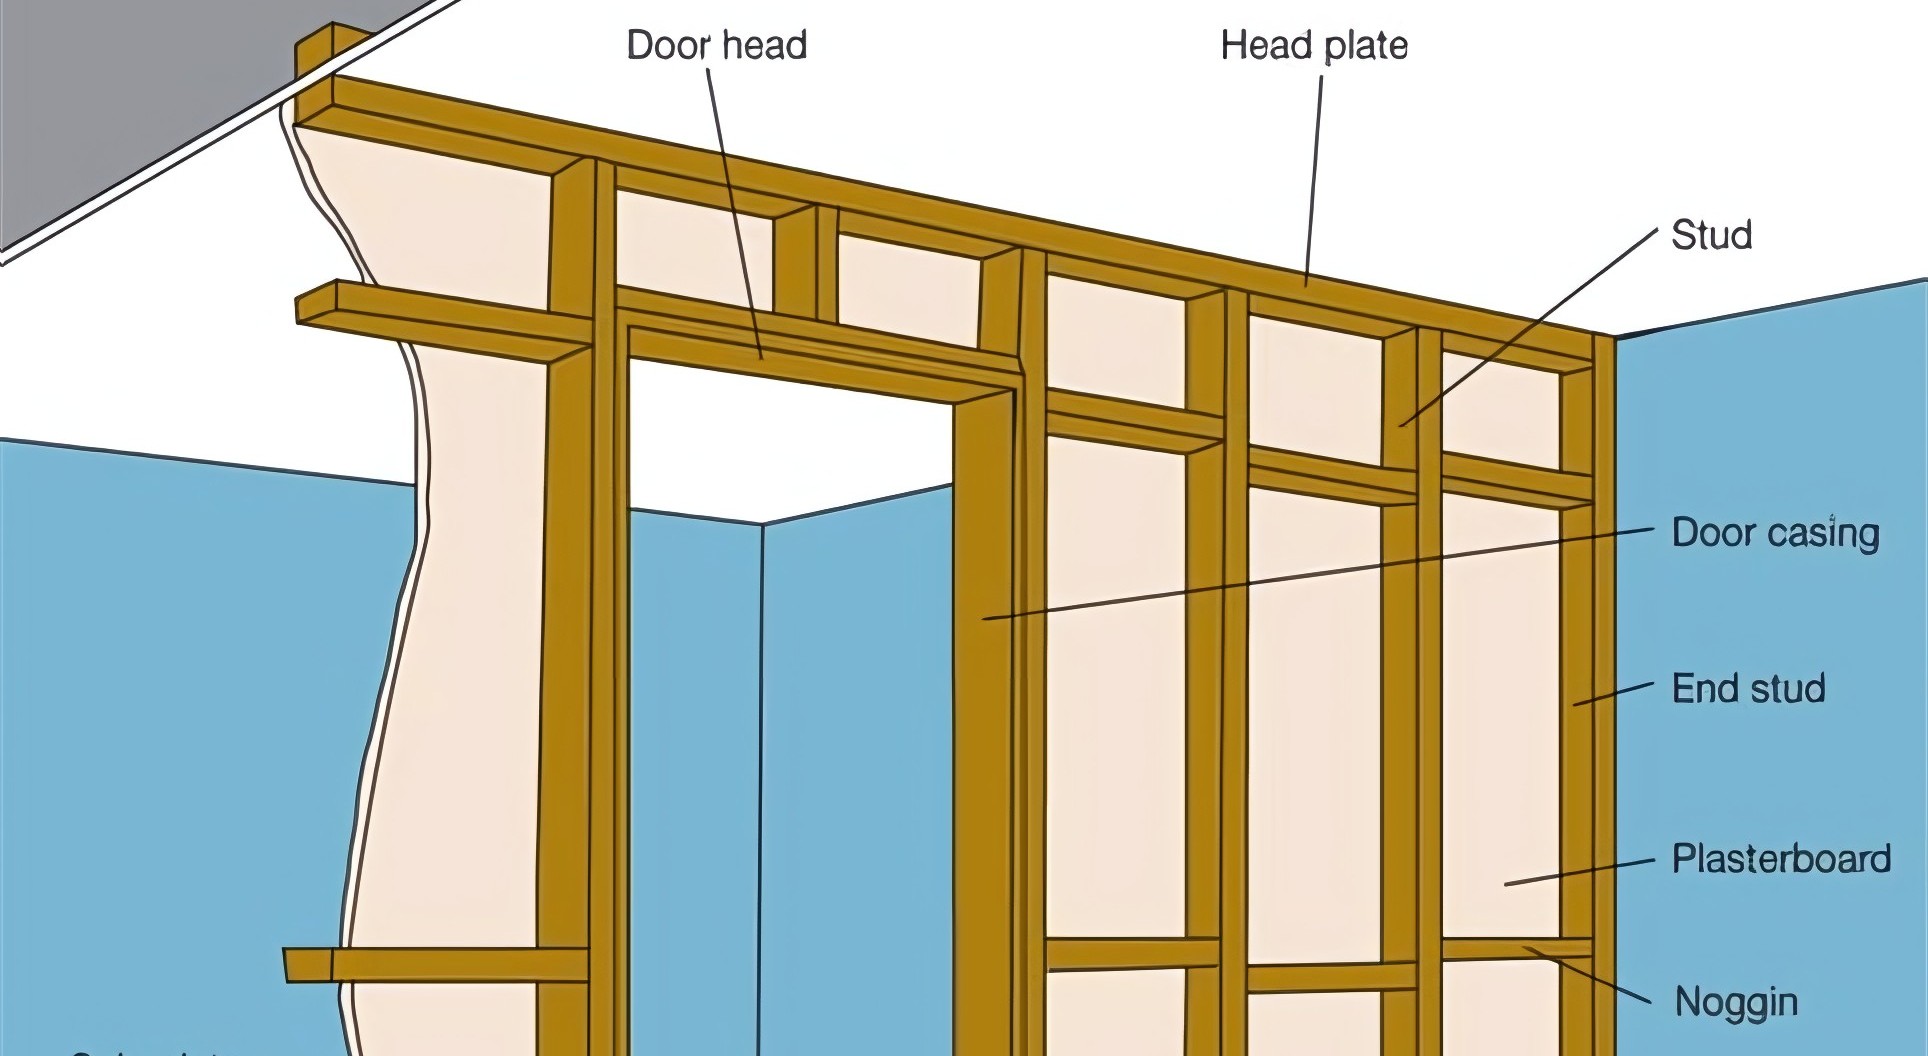
This image shows a stud partition wall under construction, specifically framing around a door opening. Here’s a detailed description of the components:
- Studs: Vertical timber or metal members that form the main structural framework of the wall. They are spaced at regular intervals.
- Head Plate (Top Plate): A horizontal timber or metal member running along the top of the studs. It ties the studs together and provides a fixing point for the ceiling or upper structure.
- Sole Plate (Bottom Plate): A horizontal timber or metal member fixed to the floor joists. The studs are fixed to the sole plate at the bottom.
- Door Head (Lintel): A horizontal timber or metal member spanning across the top of the door opening. It supports the weight of the wall above the opening.
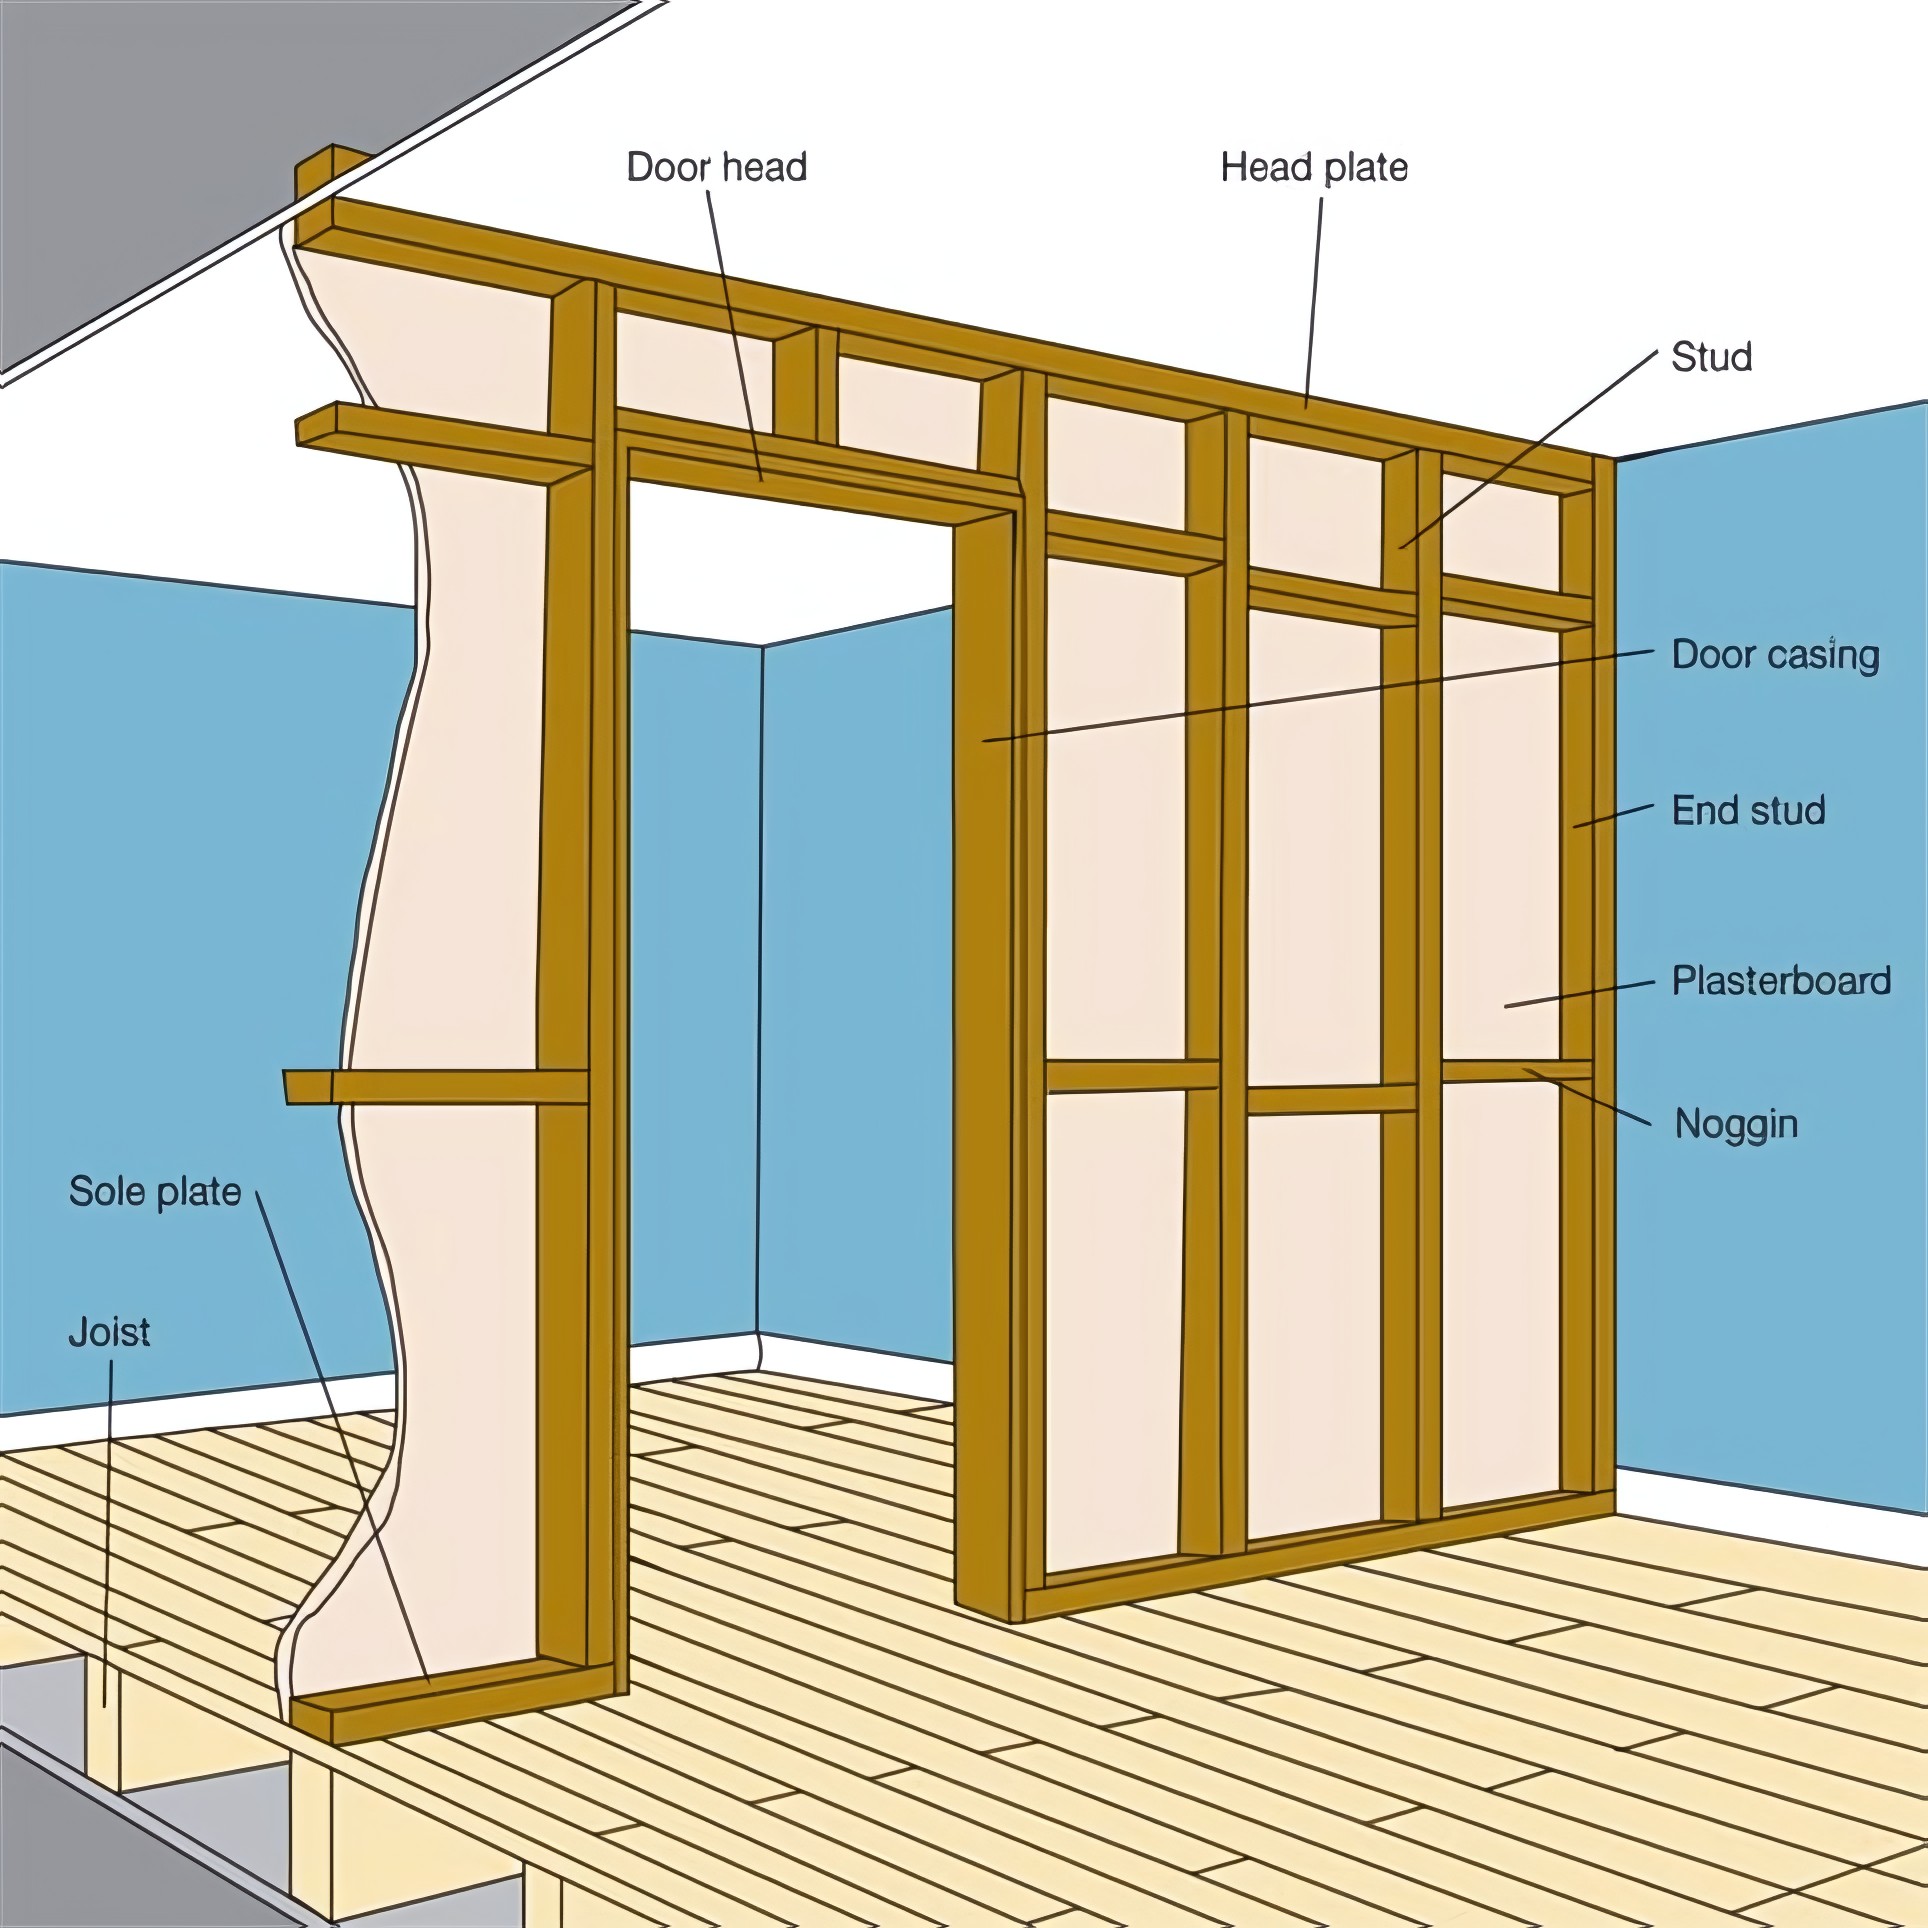
- End Stud (Trimmer Stud): Vertical studs positioned on either side of the door opening, running from the sole plate to the head plate. They provide support for the door head.
- Door Casing (Jamb): The finished frame surrounding the door opening, to which the door is attached. The image shows the rough framing before the finished casing is installed.
- Noggin (Blocking or Fire Stop): Horizontal timber or metal members fitted between the studs. They provide lateral support to the studs, prevent twisting, and can act as fire stops.
- Plasterboard (Drywall): Large sheets of gypsum board that are attached to the studs and noggins to create the wall surface. The image shows plasterboard partially installed on one side of the framing.
- Joist: One of the parallel horizontal beams that support the floor or ceiling. The sole plate is fixed to the floor joists.
The image clearly illustrates how these components work together to create the structural framework of an interior wall with a door opening, ready for finishing with plasterboard and door casing.